You won’t get far in Monster Hunter Wilds without items. It is a basic tip to learn, but having easy access to your most needed items is just as important as mastering your weapons or calling in your friends to join in on the hunt. Your radial menu allows you to quickly select and use all your equipment on the fly, but may not be set up how you want it by default. Thankfully you can easily customize this menu so all the items you want are in the places that feel most natural.
Capcom
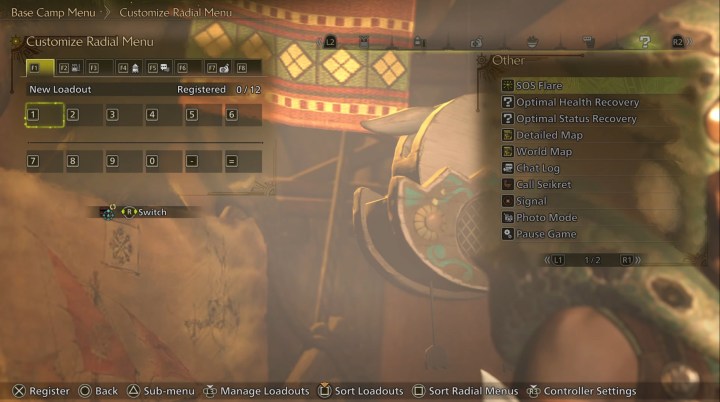
How to customize the radial menu
The radial menu is your shortcut menu that you can pop open by holding L1 on consoles. Once open, you can easily select an item by pointing your stick in any of the four directions plus change categories with the D-pad.
Step 1: Once you have access to your base camp, visit your tent or pause the game and go under the Items & Equipment menu.
Step 2: Select the Customize Radial Menu option
Step 3: You will have 36 total loadouts you can customize. Choose any blank one to begin customizing it.
Step 4: You can now choose from all your items set them to one of 12 slots. If you place something in the wrong place and want to swap it, press Sort Radial Menus and you can swap the locations of two items without removing and readding them to the loadout.
Step 5: Once you have all your items set how you like, press the Manage Loadouts button.
Step 6: Choose an empty loadout slot and press Register Loadout to add your new radial menu to that slot.
Step 7: Once set, make sure to highlight and press Use Loadout to make it active.
You can also use the sub menu to rename a loadout, set an emblem, or delete it to make room for a new one.
You can also press the sub menu button to share your loadout with friends to let them easily use the same loadout you created.